Behind the Scenes: Color and B&W Photoshoot with Nathan Elson
“Have you ever had one of those shoots where literally every press of the shutter just felt like you were creating gold?” That’s what happened to Canadian photographer Nathan Elson during a photoshoot with model Leticia. Spend a few minutes with Nathan as he takes us behind the scenes in his studio to show us how he created his color photographs as well as the black and white images of Leticia. At just under six minutes, the education from this video is definitely golden and so are the final images.
How to Use a Three-Light Setup With a Scrim + Foldable V-Flat
If you’ve got a studio like Nathan’s with tall ceilings and ample room for gear, you’ll enjoy mimicking his setup. If you don’t, don’t worry. You’ll still gain ideas for future photoshoots, maybe even outdoors where space isn’t an issue. Plus, Nathan has plenty of free education on YouTube regarding one-light setups.

With that said, let’s break down Nathan’s lighting. To camera left is the key light, a Godox AD600Pro with a 90cm deep octabox from iFootage, about five feet away from the model, raised and angled down. This is to “get a good coverage over her entire body while still keeping the shape and characteristics of the light.” According to Nathan, the reason for placing the light slightly higher than the model and angled down is to get “that really nice kinda cross lighting that’s creating those really beautiful shadows that come across the model’s face and body just to create that shape.”
The key light is metered to f/8 at 1/200, ISO 100, which means Nathan’s camera, a Nikon Z 6II, is also set to f/8 at 1/200, ISO 100 to get a proper exposure.
Behind the key light is a white, 12-foot by 12-foot, shoot-through scrim with two Godox AD600Pro lights with medium-deep umbrellas. These two lights are placed taller than the model and at the same angle as the key light to provide overall fill and follow the same path as the key light. They’re also set a stop below the key light at f/5.6 at 1/200, ISO 100.

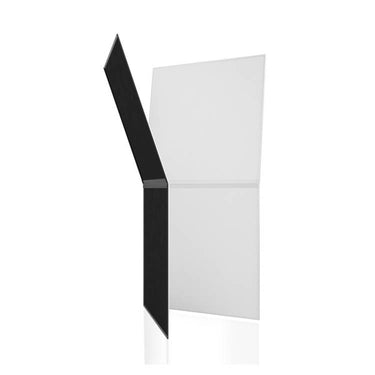
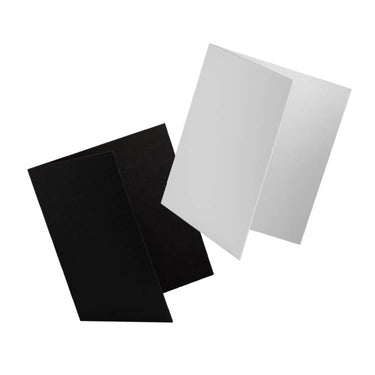
On camera right is a foldable V-Flat, with one white panel toward the model to bounce light into the scene and lighten the shadows just a touch.

How to Use a V-Flat to Get the Right Amount of Bounce
One important thing to notice about the way Nathan is using the V-Flat is that he’s mainly bouncing with just one side of it. Rather than facing both panels of the V-Flat toward Leticia, he’s got one side facing away from the scene. This is a conscious decision to control the direction and amount of light kicking back toward Leticia. Nathan says, “I didn’t want [the light] to wrap around the model, I just wanted a little push of light into the shadows.”
Details. There’s a reason why his images look as good as they do. Nathan is a light-shaping master. Attention to detail is what separates a lighting pro from a beginner. Pay attention to where the light hits, where it doesn’t, and how much light is entering the scene.
Another significant factor to consider is the position of the V-Flat in relation to the model and the key light. Nathan explains that he always places the V-Flat to catch the light from the main light saying, “I never put my model in between the V-Flat and the light. I always have the V-Flat out just a little bit so that that light can come across, hit the V-Flat, and bounce back in.” Otherwise, your model will block the light and the V-Flat won’t receive sufficient light to reflect onto the model’s shadow side.

On this shoot, every piece of the lighting setup is considered. So the next time you use a V-Flat, think about how much bounce or negative fill you want and set it up accordingly.
A Game Changer: The 90cm Deep Octa from iFootage
Not only was this a golden shoot for Nathan, but it was also the first time he used the 90cm deep octa from iFootage. Here are his thoughts on this new light modifier: “I am completely in love with the quality of light that this thing produces… I just love the way it highlights everything… this might change everything.”
Long-time viewers of Nathan’s channel are used to seeing him use the Profoto large deep umbrella with a diffusion panel. However, it looks like the iFootage 90cm deep octa may be his new go-to favorite.

The Results: Color Images of Leticia by Nathan Elson
Now that we’ve walked through the lighting, here’s what it all looks like. The first image of Leticia below is straight out of camera against a Savage seamless paper backdrop in a color called Bone.

Nathan loves shooting with this particular color of seamless backdrop because he can grade his color images in post to create a beautiful, warm tone. (See the next image below, graded with Nathan’s Capture One Styles).

And check out the rest of Nathan and Leticia’s warm-toned color photographs:


Black and White Images of Leticia
Using the exact same lighting setup that he used for the color images, Nathan made a few adjustments to the styling by ditching the tank top and shoes “to simplify things as I love simple styling when it comes to my black and white work,” he says. He also added a stool as something for Leticia to interact with and to make the photos a bit more interesting.

As mentioned earlier in our run-through of Nathan’s color images, the backdrop he used is in a color called “Bone” from Savage. Not only does this color grade nicely in post to a warm tone, but it also transforms to a “perfect light gray that just works so well for so many styles of lighting,” Nathan explains.
Nathan’s black-and-white images of Leticia prove this well. The tones are incredible.


What a great tutorial by Nathan Elson. And let’s not forget about the excellent modeling by Leticia. She is a posing artiste, turning the human form into fine art with Nathan capturing it. It pays to have a professional model on set.
Nathan, we love this behind-the-scenes look at how you light and create color photographs as well as black and white photos. Incredible work, thanks!
Gear Used in Video
Camera: Nikon Z 6II
Lens: Nikkor Z 85mm f/1.8
Lighting & Modifiers: Godox AD600Pro, iFootage 90cm Deep Octa, Profoto Medium Deep Umbrella, 12’x12’ Scrim, Foldable V-Flat
Get Connected
Photographer: Nathan Elson
Model: Leticia Moreira
Wanna Learn More?
We’ve got over 100 videos on our Behind the Scenes page with tips and tricks for photographers and videographers of all genres. Learn how to light, shoot, and more.



Leave a comment
This site is protected by hCaptcha and the hCaptcha Privacy Policy and Terms of Service apply.