3 Food Photography Angles You MUST Know
People love food photography. And it’s not just professional food photographers with their lenses in tasty morsels and full-bodied drinks. You’ll find home-cooks, recipe developers, food bloggers, and even patrons at the local diner snapping away at their meals the moment it’s served. We get it, food is pretty. It’s also tasty and makes us feel good by releasing endorphins. Our love affair with food isn’t going away anytime soon and neither is food photography. It’s a thing and it’s here to stay.
If you study food photography enough, you’ll notice that there are three main angles frequently used when photographing food and drinks: a top-down/overhead angle, a 45-degree angle, and a straight-on angle. Because food comes in varying heights and dimensions, the best angle to use is the one that shows off the main quality of the food and tells the story in the most complete way.
Let’s take a look as Tuvy walks us through these three main angles and gives us an idea of when to use them.
3 Main Angles for Food & Product Photography:
Top-Down/Overhead Angle (90-Degree)

The top-down angle is when you photograph your subject from directly overhead. This is also known as a 90-degree angle. Top-down works best for any food where most of the detail is on the top surface and wouldn’t translate as well if shot from the side. You’ll see this angle used on food that doesn’t have a lot of height, like pizza or pumpkin pies. Top-down is popular for tablescape scenes with food, drinks, and dinnerware spread across the shooting surface.
Food served in a bowl is frequently shot from a top-down angle. This is because a side view of a colorful smoothie bowl or a bowl of French onion soup with a sprig of thyme doesn’t give the viewer the best sense of what’s in the bowl. Shoot from a top-down angle when the story is best told from overhead.
If you’re a food blogger or recipe developer who wants to shoot a video demo on how to assemble ingredients and cook the food, the overhead angle is perfect for instructing in a way that the viewer readily understands. (Check out the following video to learn more about how to shoot top-down video tutorials.)
To shoot top-down, you can stand on an apple box or step stool and then handhold your camera over the food or use a c-stand rigged with a spigot and ball head. For large commercial photoshoots, you may need a sturdy studio stand. Also, be mindful of your aperture when shooting top-down. You’ll want to make sure everything is in focus, so start with an f-stop of about f/4 - f/5.6. Shoot a test shot and adjust as needed.

45-Degree Angle

A 45-degree angle (also referred to as ¾ view) is when you’re shooting above and to the side of your subject. Most of us naturally view our food at this angle when seated at meals, so it’s an angle that’s immediately familiar to viewers.
It’s important to note that while it’s called a 45-degree angle, this really incorporates any degree from about 25-75 degrees. The main point is that you’re not shooting directly above and down at your subject (top-down angle, aka 90 degrees) and you’re not shooting directly to the side (straight-on angle, aka 0 degrees).
Keep in mind that the 45-degree angle is when background elements come into play, so make sure there aren’t any distracting objects that take away from your scene. But this also gives you an excellent opportunity to include anything that will add to the story, such as beverages behind the main entree or the chairs in a restaurant. In our case, it’s the French Clay/Terracotta Blush Duo Board that’s starting to peek into the scene from behind the macarons.
Straight-on Angle (0-Degree)

“Straight-on is great for any subject with height,” Tuvy says. It could be wine bottles, stacks of cookies, a towering layer of pancakes, or a colossal 2 lb. burger. A top-down angle would do an injustice to these foods because we’d miss all the info on the side. We’d have a hard time seeing the color and label design of the wine and we wouldn’t know how grand the stack of cookies and pancakes actually are. And the colossal 2 lb. burger? With a top-down angle, we wouldn’t even know it was colossal. Again, the best angle in food photography is the angle that tells the most complete story.
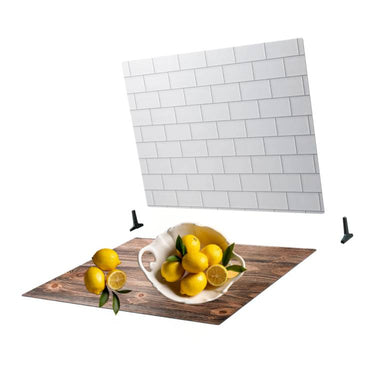
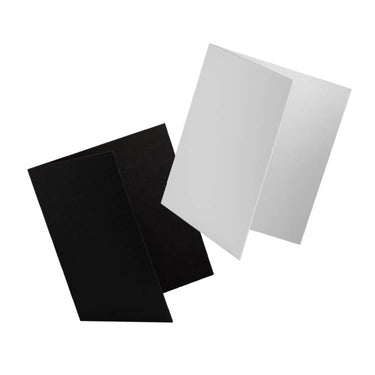
“When shooting straight on, you can incorporate a floor and a wall,” says Tuvy. Which highlights just how well Duo Boards work for food photography. Every Duo Board purchase comes with a set of Duo Legs for free (they also work with any board that’s 3mm thick). Use the Duo Legs to create a seamless floor and wall scene or to stand one Duo Board up on its own.
Bonus: Because Duo Boards come with two different surfaces on one board, if you buy two boards you’ve got four different food photography surfaces to shoot on.
If you’re on location and you want to get really creative with the straight-on angle, think about incorporating movement in the background of your scene with a slow shutter. This might look like the motion of a bustling restaurant during lunch with your main entree in the foreground. Depending on a variety of factors, this may or may not work. If anything distracts from the food, save the experiment for another time. The important thing is to play around with background elements when shooting straight on. It’s a fun angle that adds depth to your scene because it includes so much of the background.
Finding Balance in the Photo
Whichever angle you choose for food photography, make sure the photo looks balanced. Don’t tilt or skew your camera to where the food looks like it’s about to slide right out of the frame. And don’t shoot so close to the food that viewers have to guess what it is. Depending on the type of food and how it’s styled, always remember to use the angle that displays the best features of the food. Choosing the right angle for food photography – whether it’s top-down, 45-degree, or straight-on – will result in better images with powerful compositions.
Thanks for joining us for our tutorial on the three main angles used in food photography. Do you have a favorite angle? Maybe you find yourself leaning mostly toward top-down rather than straight-on. Let us know in the comments which angle you tend to shoot food with.
Want a Duo Board of Your Own?
Get your hands on two or more of these lightweight, double-sided, and highly portable backdrops for photographers and videographers. Browse our hyper-realistic surfaces, then choose which size fits your needs. Our 24”x24” size is under 2 lbs and our 30”x40” is under 3 lbs.
Wanna Learn More About Food Photography?
We’ve got over 100 videos on our Behind the Scenes page with tips and tricks for photographers and videographers of all genres. Learn how to light, shoot, and more.


Leave a comment
This site is protected by hCaptcha and the hCaptcha Privacy Policy and Terms of Service apply.