Top 10 Best Tips and Tricks for Food Photography

“We Eat First With Our Eyes” – Apicious, 1st Century Roman
Just as Apicious stated, our first exposure to food is often through our eyes. This 1st century Roman and lover of gourmet living was onto something. The look and presentation of a dish or drink has a lot to do with how much we’ll desire it. If it looks sloppy, ill-colored (or colorless, for that matter), or confusing, we’ll steer away. But if it’s well-lit with contrasting colors and a composition that leads the eye all over its heavenly goodness, well then… start your salivary glands.
When you capture the attention of a viewer with captivating food photography, you’ve got a higher chance that they’ll stick around, which means you now have the chance to sell to them. If you want people to slow their scroll on social media, or subscribe to your foodie magazine, or stop into your restaurant, then it’s time to learn some Food Photography 101.
10 Best Tips for Incredible Food Photos:
1. Pay Attention to the Light
It should go without saying, but the most important thing in food photography (as well as all other forms of photography) is the light.
Pay attention to the light. We cannot stress this enough. After all, the word photography literally means “drawing with light.”
Look at the quality of the light:
- Is it hard, soft, direct, diffuse?
- What direction is it coming from?
- Is it coming from the side?
- Backlighting the food?
- Directly on camera?
- Overhead?
Food Photography Lighting is 🔑

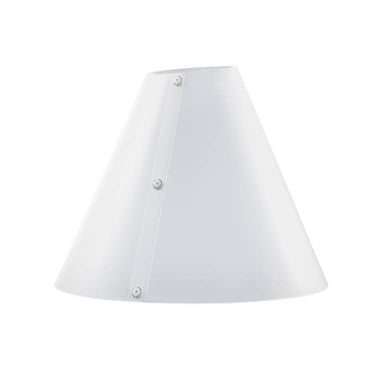
We’ll stop you right there if the light is coming from your on camera flash or from an overhead light source, as both options are a no-go. Turn off that on camera flash as well as the overhead light, if you can. If you can’t, then flag the overhead with a light modifier.
Direct flash adds unflattering elements to the scene such as distracting highlights, strange reflections, and harsh shadows. Overhead light flattens the scene, rendering it lifeless, and can cast unwanted color onto the food and props.
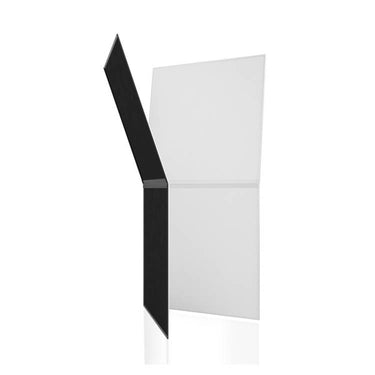
If you’re new to lighting, the easiest thing you can do is to use natural light. Move the food next to a window or place it outside in open shade. If the light is harsh, diffuse it with a scrim (aka diffuser) or a thin white bedsheet. Add a V-Flat or reflector opposite the light source to bounce light into the shadow areas.
Your food photography will become 100% more appealing with good light as the foundation.
2. Learn Color Theory for Food Photography


Whatever drink or food you’re shooting, look at the color. Is it a bowl of oatmeal in a white dish on a beige surface with a white background? Unless you’re going for a monochromatic look, that combo isn’t going to cut it in the world of food photography. You want your food images to have color and contrast so that your eyes move around the scene rather than glaze over.
Going back to our oatmeal example, if your food doesn’t contain a lot of color, then think about what you can add to the scene to boost the visual interest. Find colorful toppings and garnishes to sprinkle on top. Use a bowl that adds contrast to the oatmeal. Consider the props. What utensils and linens can you add to give color and texture to the scene?
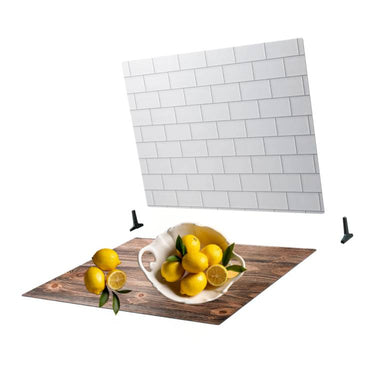
If you really want to elevate the quality of your food photography and quickly change the color and tone of your set, consider using ready-made Duo Board surfaces. These hyper-realistic backdrop boards are made to look like wood, stone, marble, tile, and more – and they’re easy to set up and clean.
3. Composition Matters
Like our previous section on light, a knowledge of composition is a basic tenet of great photography. The drawback to mastering composition is that it does take time to train your eye so you can see what makes a balanced, attractive food photograph. Take the time to study the photographs in cookbooks, lifestyle magazines, and respected food blogs. Scrutinize what makes your eye linger on one image versus another. Which photos make you want to eat the food right off the page and which ones totally miss the mark?
As you study and make notes on what works and what doesn’t, you’ll build a mental library you can refer to while on a food shoot.
With that said, here are some practical tips to help you get started on your compositional journey:
Learn the Rule of Thirds

If you’re unfamiliar with this, here’s a quick run-through on the rule of thirds:
Use the grid in your viewfinder or pretend there’s a tic-tac-toe board dividing your scene into nine equal parts. Place your subject matter along the intersecting lines and shoot.
Here’s a closer look at the rule of thirds in food photography.
Learn About the Golden Triangle

The golden triangle is a compositional device that breaks the image into triangular sections in order to lead the eye through the photo in a continuous loop. This keeps the viewer engaged in the image. Familiarize yourself with the golden triangle by viewing tip number 10 in this article on food compositions.
Don’t Overwhelm the Scene | Pay Attention to Negative Space

Start with your main item (the hero) and build the scene from there, adding props as you go. Make sure nothing competes with the hero and use the props to create lines that lead the eye around the food and back to it. Be sure to periodically step back in order to assess how well the scene is coming together. If it feels too busy, pull out items one at a time until the negative space perfectly balances the scene.
4. Vary Your Camera Angles
Because food comes in varying heights, it doesn’t make sense to shoot every edible thing from overhead. A burger shot from overhead does not translate as well as a pizza shot from overhead.
Before we go over them in more detail, here’s a quick list of the three primary angles used in food photography:
Overhead angle
¾ angle
Side angle
Overhead Angle


Photos by minimalistbaker
The overhead angle is just what it sounds like: the camera is directly overhead, shooting down at the food. Do a search of smoothie bowls and pizzas and you’ll see nearly every image is shot from overhead.
This is because foods like pizza, smoothie bowls, and soups tell the story best from overhead.
An overhead view works well for foods that contain graphic elements best seen from the top.
A side view would completely miss the beauty of what’s in the smoothie bowl. A ¾ view would tell the story, but not as fully as the overhead view. Use the angle that tells the best, most complete story.
3/4 Angle
The ¾ angle is an image shot from the side and above the subject, to varying degrees (25-75 degrees). This is the angle that we naturally view our food from when seated at a meal. It’s a versatile angle, commonly used in food photography, that shows off both the side and top of the subject.

Head On

Some foods are best photographed head-on. Think burgers with juicy layers, a tall stack of pancakes, and cakes with details on the side. Side (head-on) angles often incorporate background elements, so make sure anything in the frame is contributing to the shot.
5. Make the Scene Readily Understood by the Viewer
This tip is quick and simple. Many newbie food photographers shoot too close to the food or with a depth of field that’s overly shallow. A scene shot too tightly or too out of focus risks confusing the viewer – and confused viewers don’t stick around to hear what you have to say.
So step back and don’t shoot too close to the food. Create images that viewers can quickly and easily understand.
6. Pay Attention to Your Props and Surfaces
What’s the look you’re going for? Bright and airy? Dark and moody? Colorful and fun? Choose a surface and backdrop that lays a foundation for the scene. Need some inspiration? Browse our double-sided food and product backdrops.
Which bowl or plate works best to contain the food? Does it need a tray or a kitchen towel underneath to add visual interest? Vary your textures. Juxtapose smooth and rough surfaces, reflective and non-reflective.
Carefully chosen props and surfaces add color, texture, character, and movement to your food photographs.
7. Understand Basic Food Styling
It really doesn’t need to be said, but make sure it’s beautiful. Start with fresh, quality ingredients and skillfully cooked food. Plate it well and add props that make sense and tell the story. Look for colors and textures that complement your food. Add cloth napkins or kitchen towels to increase depth and dimension. Give the scene character with unique cutlery.
Here are a few more quick tips for food styling:
Smaller bowls and plates generally look better for food photography.
Group items in odd numbers, which creates a more dynamic composition.
Underripe veggies and fruits work best.
Don’t be afraid of drips and crumbs – this adds an element of life to the image.
Use a human hand to pour liquids, hold mugs or grab a morsel of food, which also adds life by bringing a human element to the scene.


Photos by Hudi Greenberger
8. Consider the Process | Shoot Before, During, and After a Food Shoot
Not only do people love behind-the-scenes photographs, but shooting throughout the process sharpens your eye. Photograph the food while you’re pulling out ingredients, while you’re cooking, and as it comes out of the skillet or oven. Then shoot as the set is broken down.
Often, you’ll find imagery that works better than you’d originally planned. A beautiful flat lay might present itself as you lay ingredients on the butcher block. Or perhaps your original plan was to plate the steak with a side of asparagus, but as you shot the process, you found it actually looked amazing in the skillet.
Shoot before, during, and after. You’ll hone your eye and capture scenes that’ll both educate and pleasantly surprise you.
9. Buy the Best Lens for Food Photography That You Can Afford
Camera bodies come and go, but quality lenses stick around, so buy the best lens you can afford. You don’t have to break the bank. The “nifty-fifty” 50mm lens will do for a full-frame camera. Even a f/1.8 will work until you can upgrade.
If you get serious about food photography, consider adding a 100mm macro. Even a 24-70 zoom will work. Read more about lenses for food photography.
Want the Lamborghini of all food photography lenses? Then consider a tilt shift lens. Either a 90mm tilt shift for Canon or an 85mm tilt shift for Nikon. This baby ain’t cheap, but there’s a reason why it’s called “Little Sexy” by photographers – because this lens can make even cereal look sexy.
10. Have Fun and Keep Trying
Food photography is a beast. There are a ton of moving parts on a food shoot. If you aren’t at the point where you can have a dedicated prop and food stylist on hand, you’ll find yourself wearing many hats and needing several skills. These are hats that you can certainly wear and skills that you can certainly learn – just know that it may take a lot of effort and time to hone your craft if you’re new to food photography.
But if it’s something you love, then go for it. It can be frustrating when you’re first starting out, but keep practicing, have fun, and keep trying.
You got this.
Thanks for hanging with us. We hope you learned something new and valuable to add to your bag of tricks. Until next time, feel free to browse the rest of our resources. We’ve got over 100 videos with tips and tricks for photographers and videographers who shoot in all genres.
Check out our video detailing our Duo Boards, hyper-realistic and portable photo backdrop boards for food and product photography and videography.
Want a Duo Board of Your Own?
Get your hands on two or more of these lightweight, double-sided, and highly portable backdrops for photographers and videographers. Browse our hyper-realistic surfaces, then choose which size fits your needs. Our 24”x24” size is under 2 lbs and our 30”x40” is under 3 lbs. Elevate your food and product photography today.


2 comments
Great article, covering all the essentials!
Troy Washington
This is a very interesting article. Please, share more like this!
Towab Muhamamd Yusuf
Leave a comment
This site is protected by hCaptcha and the hCaptcha Privacy Policy and Terms of Service apply.