Using Studio Lights with the Light Cone
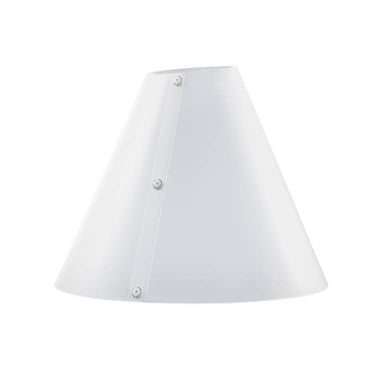
In this video, Karl Taylor (the genius behind the Light Cone) shows us how to use the Cone in his UK studio with some badass studio lights. Karl demonstrates how to position your lights to achieve specific lighting results. Moving the lights closer to the cone with give a more specular look to the item but moving the lights farther back will soften everything up.
First, Karl takes a picture of a shiny gold dimmer switch with just the studio lights, without any accessories. The photo doesn't look great because of dark reflections and odd bits of lighting. This is where the Light Cone comes in. He puts the Light Cone over the dimmer switch, and instantly, the lighting looks much better through his camera.
Making the Light Work for You
Karl shows us how to move the lights around to get the best look. At first, the light is too bright on one side of the switch. By moving the lights, he gets a nice, even light from the top left corner, making the switch look great. This proves how flexible the Light Cone is for getting the perfect shot.
He also demonstrates that you don't need multiple lights. By using just one light and the Light Cone, he achieves a beautiful result with a smooth gradation of light across the switch. The inside of the Light Cone reflects light around evenly, making just one light source enough to take professional-looking photos.
Important Tips and Tricks for Using Studio Lights with the Light Cone
One great tip to keep in mind is that continuous lights can get really hot. The Light Cone is made to handle heat, but you still shouldn't keep the light too close for too long. Karl suggests turning off the modeling light when not needed to prevent overheating.
So there you have it; Karl shows how the Light Cone, paired with studio lights, can make photographing reflective objects easy and fun. By adjusting the lights and using the Light Cone, you can get amazing photos without needing a lot of equipment.
Shop The Light Cone
WANNA LEARN MORE?
To be sure you're getting the most out of your photography light cone, check out our Light Cone Tips & Tricks on our YouTube channel. With a little guidance, you'll be taking stunning product photos in no time!
We’ve also got over 100 videos on our Behind the Scenes page with tips and tricks for photographers and videographers of all genres.


1 comment
I have been using Light Cone’s for product photography with studio lights since they came out. I have tried to get creative with the Light Cone to try and shoot something other that a flat lay. Any thoughts?
Garrett Fischer
Leave a comment
This site is protected by hCaptcha and the hCaptcha Privacy Policy and Terms of Service apply.