5 Lighting Setups Using One Umbrella | Emily Teague
Emily Teague is in the studio and ready to make lighting feel way less intimidating. Known for her polished portrait and fashion work, she walks through five different setups using just one umbrella. No fancy gear switching. No overcomplication. Just one medium-sized Photek Softlighter with a silver interior and a diffusion sock thrown on for softer output.
Emily’s gear for this shoot is minimal but deliberate. The silver lining gives the light some punch and contrast, while the diffusion sock smooths it all out into something soft and flattering. Working with her model, Aja, Emily shows us the easy-to-create umbrella lighting setups, each with its own mood and result.
5 Unique One-Umbrella Lighting Setups:
Setup 1: Off-Center and Classic
First up, Emily keeps it simple. She places the umbrella just off-center from the camera, slightly to the right of her shooting position. It’s raised above Aja’s eye level, angled down to shape the light.
That placement does a few things:
- Catchlights land at around 2 o'clock in the eyes
- Shadow under the jawline adds nice definition
- Soft falloff on the far side of the face gives a natural contrast
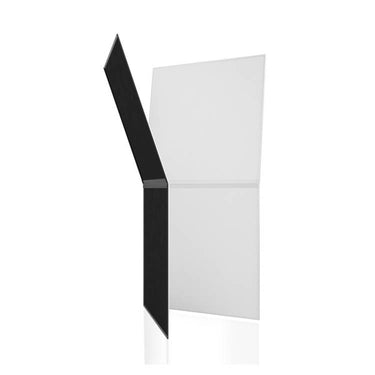
The only issue? Some heavy shadows to camera left. Emily likes the drama, but also wants to see what happens if she lightens it up. She grabs a white V-Flat to bounce some light back in. No V-Flat? A white wall or sheet of paper can do the trick.
With the fill in place, the shadows soften just enough to keep depth without losing detail.

Setup 2: Overhead and Moody
Now she shifts the umbrella directly overhead – but not too far back. It’s still a foot or two in front of Aja, just enough to avoid creating shadows in the eye sockets (a.k.a. raccoon eyes). The overhead placement gives a nice top-down look, with beautiful symmetry and catchlights in both eyes.
The biggest visual difference here is in the background. Because the light is more focused downward and isn’t hitting the backdrop, the background gets darker – adding mood and contrast without needing a separate light.
Aja tilts her chin up slightly to catch more light in the eyes. The result is even, glowing skin and gradual shadow transitions across the face.

Setup 3: Feathered Side Light with Drama
For the third look, Emily swings the light all the way to the side of Aja. It’s now positioned 90 degrees from the camera – classic side lighting.
Here, the umbrella creates a strong contrast between the lit side of Aja’s face and the shadow side. It’s a moodier setup, perfect for a dramatic portrait. Emily keeps the V-Flat nearby to bring back a little fill if needed, but overall, this setup leans into deeper contrast and shape.

Setup 4: Backlit Glow with Bounce
Next, she turns the umbrella around and places it behind Aja and behind and above the background, aiming it back toward the camera. This setup gives a glowing rim light across the hair and shoulders, with no direct key light on the face.
To balance things out, Emily uses a white bounce in front of Aja – again, the V-Flat steps in – to reflect some light back onto her face. The result is soft, ethereal lighting that wraps beautifully and separates the model from the background.

Setup 5: Clamshell with Contrast
For the final setup, Emily creates a classic clamshell arrangement. The umbrella angles down toward Aja's face from above, while a standard reflector positioned below bounces light back up under her jaw.
She removes the V-Flat from the side since she wants even shadows on both sides of Aja's face. An apple box tilts the reflector at just the right angle, creating more prominent catch lights.
It’s a more stylized setup, ideal for fashion or editorial work. No fill here – just clean lines, sharp contrast, and intentional shadow.

Five Angles – One Umbrella – Infinite Style
Throughout all five setups, Emily shows just how much mileage you can get from a single umbrella when you understand placement and angles.
"Five completely different looks, one umbrella, same model, same basic setup," Emily says.
The takeaway: you don’t need a dozen lights or fancy gear to make impactful work. You just need to know how to move what you have.
Shop V-Flats
Get Connected
Follow Emily on Instagram or visit her website to learn more about her work.
Wanna Learn More?
We’ve got over 100 videos on our Behind the Scenes page with tips and tricks for photographers and videographers of all genres.


1 comment
Hi Emily,
Thank you for creating and sharing this video.
Gary
Gary Altoonian
Leave a comment
This site is protected by hCaptcha and the hCaptcha Privacy Policy and Terms of Service apply.