Product Photography Tips & Gear for Every Level
Whether you're shooting with a smartphone in a small apartment or running a full-blown studio setup, product photography can be tackled at any level – and Sam Fuller from B&H Photo is here to prove it. In this video, Sam walks us through three different product photography setups: beginner, mid-level, and professional. Each setup features a distinct style and gear list, along with tips to make your photos stand out no matter your experience level.
Sam uses three items throughout the shoot – cosmetics, coffee, and a candle – to show how gear and technique evolve at every stage.
3 Levels of Product Photography:
Planning Your Photoshoot: The Foundation
Before diving into gear specifics, it's important to understand your subject. Ask yourself who the product is for and what aesthetic the brand represents. This bit of research will help you decide on the shoot's direction, influencing everything from prop selection to lighting choices.
"If the company that you're working with gravitates towards a clean, minimalistic branding, maybe put down the cherry red seamless backdrop," Sam says. She stresses that quality trumps quantity when it comes to props, recommending photographers research key ingredients or relevant items that add intrigue without overwhelming the frame. The golden rule? Always keep the product or brand as the focal point.
Beginner Level: Start with What You Have
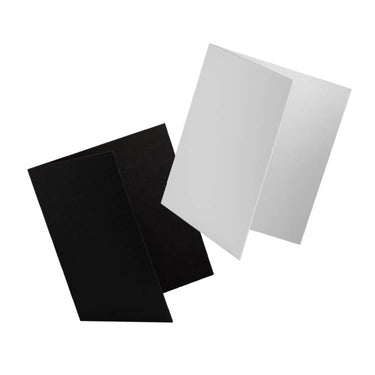
Sam kicks things off with a straightforward iPhone 11 shoot – perfect for beginners working out of a small apartment. The setup is basic but effective, using natural window light as the main source. To control that light, she hangs sheer curtains for diffusion and bounces light using whatever’s available – reflectors, a mirror, or even white cardboard.

Beginner Gear:
- Camera: Smartphone; in this case, an iPhone 11
- Lighting: Natural light from large windows
- Light Modifiers: Sheer curtains for diffusion, reflectors, mirrors, or white cardboard
- Optional Addition: Small LED light like the Nanlite PavoTubes
Sam's tips for beginners:
Use natural light if you have big windows.
Control shadows and highlights using cheap reflectors or DIY solutions like white foam boards.
Add dimension by including household items as props – plants, flowers, coffee beans – whatever fits the product’s aesthetic.
Boost light subtly with small bi-color LEDs like the Nanlite PavoTubes, which are compact and adjustable in color temperature to match existing light.
The focus here is on simplicity and creativity. You don’t need much gear – just thoughtful lighting, good composition, and props that don’t distract from the product.
Mid-Level: Stepping Up with Mirrorless Cameras and Macro Lenses
For those ready to invest in their first serious kit, Sam suggests moving to a mirrorless camera setup. In the video, she uses both a Canon R6 and a Sony ZV-E10 II, paired with a 100mm macro lens – ideal for tight, detailed product shots.
Macro lenses allow photographers to get physically close to subjects, creating a larger-than-life perspective.
For lighting, Sam presents two paths: continuous LED lights for hybrid photo/video shooters, or strobes for maximum power and creative control. The strobes allow full control over exposure settings, letting you shoot at any desired aperture.
Softbox selection depends on the products being photographed. For glass cosmetics bottles, like the one she shoots in the video, Sam recommends thin rectangular modifiers (strip lights) that create beautiful shapes along the sides. Larger scenes benefit from bigger rectangles or octagonal modifiers.
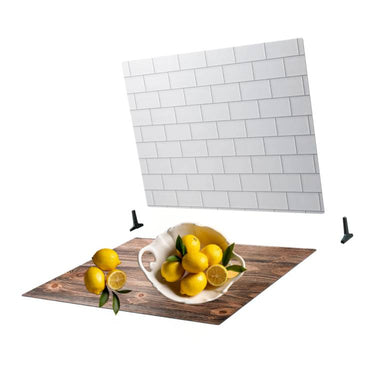
For the backdrops, Sam uses Subway Tile and Marble Duo Boards for the clean aesthetic cosmetics bottle and a blue backdrop from Savage that matches the coffee packaging. She incorporates relevant props like cucumbers for the refreshing serum experience and chocolate and walnut pieces that represent coffee flavor notes.
Mid-Level Gear Setup:
- Cameras: Canon R6 or Sony ZV-E102
- Lenses: 85mm or 100mm macro prime (or zoom lens for versatility)
- Tripod: Lightweight tripod with ball head (like the Robus RCC 3060)
- Lighting: 400-watt strobes with smaller 250-watt or 100-watt lights for accent
- Modifiers: Various softboxes matched to product shapes
- Backgrounds: Seamless paper or textured surfaces, like V-Flat World Duo Boards
Sam’s mid-level tips:
Use a macro prime (85mm or 100mm) for tack-sharp detail and compression.
If you shoot more than just products, consider a zoom lens for flexibility.
Get a compact tripod with a ball head, like the Robus RCC-3060, to lock in your angles.
Upgrade your lighting with bi-color continuous lights to maintain consistency in every frame.
At this stage, you may still be working from your living room – but with better control over exposure, sharpness, and lighting, the results start to look more polished and commercial-ready.
Professional Level: Commercial Excellence with Full Control
Finally, Sam dives into the pro-level setup – a more controlled, stylized studio shoot featuring a full-frame camera, studio strobes, seamless backdrops, and detailed prop styling.
Professional Gear Arsenal:
- Camera: Canon R5 with 100mm macro lens
- Lighting : Profoto B10X and B10X Plus strobes
- Modifiers: Professional softboxes and various light shapers
- Backgrounds: Savage seamless paper backdrops
- Advanced Techniques: High-speed sync, compositing preparation
The professional setup focuses on speed, power, and reliability. Sam uses the Profoto strobes for their incredible performance and build quality, essential for commercial work where consistency matters.
For the candle shoot, she relies heavily on propping rather than complex lighting, using fake moss, rocks, and dried flowers to complement the fern and moss scents. These natural elements can be positioned in front of the lens, used as backdrop elements, or arranged to frame the subject.
The cosmetics shoot maintains the minimalistic brand aesthetic with a white backdrop and simple lighting, but introduces a creative element: a fish tank filled halfway with water. Sam attaches fishing line to the serum bottle, allowing her to control its position precisely while creating bubble effects. This technique gives her better control over autofocus issues that can occur when shooting through glass.
The coffee setup demonstrates advanced commercial techniques. Sam uses high-speed sync to capture motion, having a colleague pour coffee beans into a mug for one shot and coffee liquid for another. These images are then composited in Photoshop to create a single, dynamic photograph showing both pouring beans and splash effect.
Sam's high-end product photography tips:
Use a high-resolution camera to capture fine detail, especially for commercial or beauty work where clarity matters.
Invest in reliable, consistent lighting to maintain control over exposure and color across sets.
Shape your light using tools like softboxes, reflectors, and flags to add dimension, reduce shadows, and control spill.
Incorporate color gels or custom backgrounds to create on-brand color palettes or striking visual themes.
Style your set with intentional, minimal props that enhance the concept without stealing focus from the subject.
At this level, every element is deliberate – from lighting placement to backdrop color to how the logo catches a highlight. Sam stresses that the product or brand should always be the star of the image, and that clean, minimal setups often work best.
Key Takeaways for Every Level
Throughout her demonstrations, Sam emphasizes several consistent principles that apply regardless of gear level:
- Planning is crucial: Understanding the brand and product drives all creative decisions.
- Props should enhance, not distract: Every element should support the main subject.
- Natural light is powerful: Even professionals benefit from understanding natural light principles.
- Invest in growth: Choose gear that will remain useful as skills develop.
- Technical knowledge enables creativity: Understanding your equipment allows for more ambitious shots.
Wanna Learn More?
We’ve got over 100 videos on our Behind the Scenes page with tips and tricks for photographers and videographers of all genres. Plus, here are a few specifically about product photography:




Leave a comment
This site is protected by hCaptcha and the hCaptcha Privacy Policy and Terms of Service apply.