


How to Master Rim Lighting with John Gress
Rim lighting can make portraits look bold, sculpted, and full of dimension. In one of his go-to setups from his One Light Lighting Handbook, John Gress shows us how to create dramatic and sleek rim lighting with just one light, a V-Flat, and some smart positioning. Here’s a step-by-step guide to building the look and tweaking it for different situations.
Building the Look
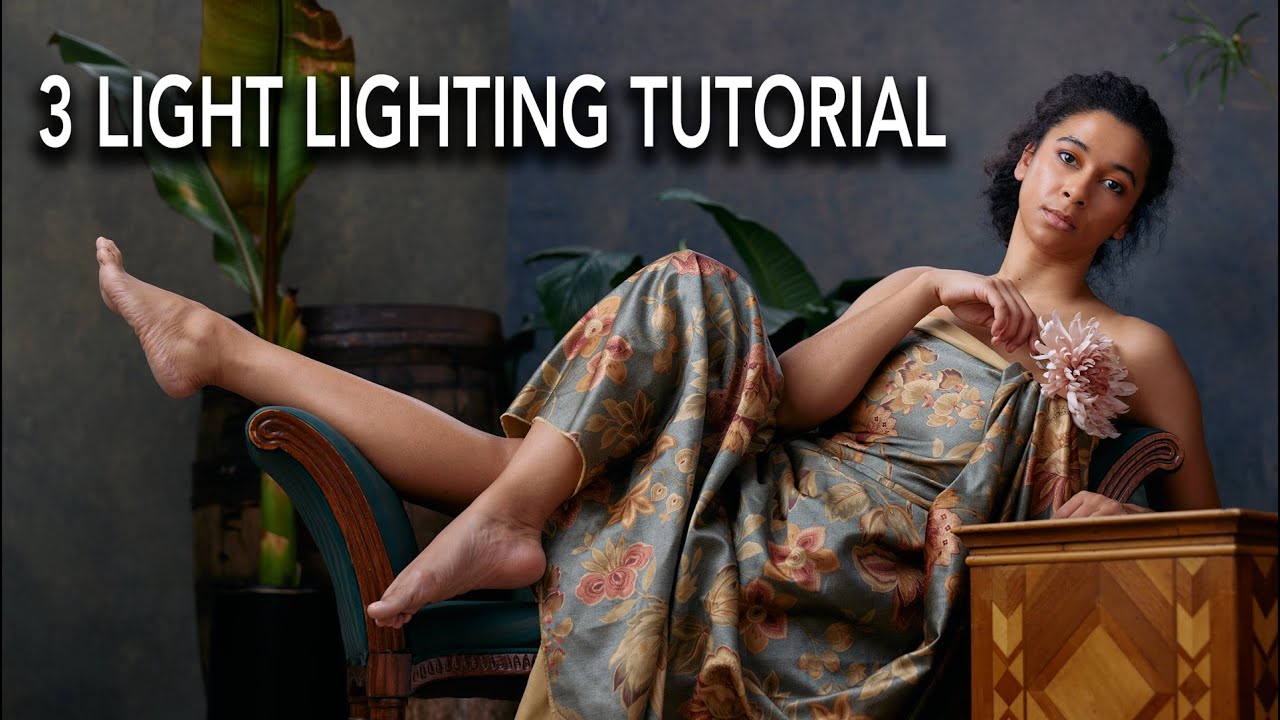
The idea started during a workshop in Boston when someone asked John for a silhouette-style shot with the model in profile against a black background. With no black backdrop on hand, John improvised using a V-Flat from V-Flat World. That became the background, and he paired it with an Elinchrom 190cm (about 75-inch) octabox. By leaning the V-Flat against the octa, the edges of the softbox peeked out from the top and sides, wrapping light around the model to create a rim-lit effect.

Step 1: Set Up the Background
Place a black V-Flat behind your model.
Lean it against a large light source – in John’s case, an Elinchrom 190 cm (75 inch) octabox.
Leave some of the white surface of the octabox visible at the sides and top. This “wraparound” glow is what creates the rim effect.
If you don’t have a V-Flat World V-Flat, any large black surface will do. The key is leaving about a foot of white light showing on each side.
Step 2: Position Your Model
Have your subject stand in front of the V-Flat.
Move them slightly left or right to control how much rim light appears along the edge of their body. The closer they are to the exposed white surface, the brighter that edge will be.
Raise or lower the octabox to control the highlight on the hair. More white surface exposed at the top means more glow.

Step 3: Dial In the Pose
Ask the model to turn their head just enough so both eyes catch the light.
Position yourself slightly off-center to make sure the catchlights land in both eyes.
Keep experimenting with subtle shifts until you see balanced light wrapping around the face.
This setup works for shirtless fitness portraits, moody headshots, or even more formal poses. The rim light naturally defines shape and adds drama.
Step 4: Avoid Common Mistakes
Don’t let the model look too far toward the light – it creates a weird catchlight in the eye.
Don’t have them look too far toward the camera either – the far eye will lose its sparkle.
The fix is small adjustments: head angle plus your shooting position.
Step 5: Adapt If Your Gear Is Different
Not everyone has the exact same setup, and that’s okay. Here are alternatives John suggests:
If a full-size 4x8 V-Flat blocks too much light, add a strip light to the side.
If you’re using a smaller five-foot octabox, shift the V-Flat off to one side and add a stripbox on the opposite side.
No V-Flat? Use a big umbrella with diffusion, two rectangular softboxes side by side, or just strip lights on each side.
The goal is simple: keep some bright white light wrapping around the black background so the model’s edges glow.
Step 6: Add Finishing Touches
In some cases, you’ll need a little extra definition. During a workshop in Washington, DC, John added a low stripbox to highlight the back of a model’s leg so the pose stood out from the black backdrop. It’s a small touch, but it makes a big difference.

Experiment with Rim Lighting and Have Fun
John stresses that rim lighting isn’t about following one rigid formula. It’s about solving problems with the gear you have, shaping light until it works, and pushing yourself to try new variations.


Leave a comment
This site is protected by hCaptcha and the hCaptcha Privacy Policy and Terms of Service apply.