3 Tips for Flattering Darker Skin Tones in Portraits | Lindsay Adler
Lighting and photographing different skin tones requires an understanding of how light interacts with various complexions. In this video, renowned fashion and beauty photographer Lindsay Adler breaks down her approach to capturing darker skin tones in the most flattering way possible. Her three key focus areas – white balance, quality of light, and fill light – help ensure that rich skin tones maintain their depth, vibrancy, and detail.
Beyond these core principles, Lindsay also dives into highlights, common mistakes photographers make, and creative choices that can enhance the final image. Whether you're shooting in a studio or using natural light, mastering these techniques will help you bring out the best in your subjects.
1. Dial in White Balance for Natural Skin Tones
One of the biggest mistakes photographers make when shooting darker skin tones is relying on Auto White Balance. Cameras often misread the warmth and richness of deeper complexions, cooling them down too much and creating an unnatural, grayish look. To avoid this, Lindsay recommends setting white balance manually.
Getting this right in-camera makes all the difference. If white balance is off, no amount of editing can fully bring back the subject’s natural skin tone. Here are a few ways to get it right from the start:
- Use a white balance preset that matches the lighting environment. The Flash preset is great for strobes, while daylight or shade presets work well outdoors.
- For precise results, use a gray card or color checker. A gray card lets you set an exact custom white balance in-camera, while a color checker provides reference points for post-processing.
- Balance accuracy with creative choices. Once you’ve nailed an accurate white balance, you can adjust it slightly for artistic effect. A bit of warmth can enhance the richness of darker skin tones, while cooler tones can work for specific moods or styles. The key is starting from a neutral base so any changes are intentional.

Lindsay stresses the importance of training your eye to spot subtle shifts in skin tone. If a subject’s skin looks dull, washed out, or overly cool, white balance is often to blame. Adjusting it in-camera or in post can instantly bring back vibrancy and depth.
2. Choose the Right Light for Best Results
The type of light you use has a huge effect on how darker skin tones appear in a portrait. Lindsay explains that different lighting setups – from soft light to hard light – create dramatically different results, so it’s important to be intentional about how you shape your light.
Soft Light for a Smooth, Even Glow
Soft light is great for a polished, flattering effect because it reduces harsh shadows and creates smooth, natural highlights. Large, diffused light sources work best for this. Lindsay’s top picks include:
- A large umbrella with diffusion fabric for broad, even lighting.
- A softbox or octabox for controlled but diffused illumination.
- A beauty dish with a diffuser sock for soft yet defined lighting with a nice balance of contrast and smoothness.
Soft light is a go-to for fashion and beauty photography, where an even skin tone and a subtle glow are key. The gentle transition between highlights and shadows keeps the skin looking natural while maintaining depth.
Hard Light for Bold, High-Contrast Looks
Soft light is safe and flattering, but sometimes a more dramatic look is the goal. Hard light creates sharp shadows and strong highlights, which can define a subject’s features in striking ways. However, it needs to be positioned carefully to avoid unflattering results.
With darker skin tones, highlights play a bigger role in defining facial structure than shadows do. Placing the light to emphasize natural highlights on the forehead, cheekbones, and nose can add depth and shape without overexposing certain areas.
To create hard light, try using:
- A bare strobe or flash for strong, directional lighting.
- A silver reflector for punchy, high-contrast highlights.
- Gelled lights to add color while keeping the contrast.

Lindsay suggests experimenting with both soft and hard light to understand how each interacts with different skin tones. The key is to control the highlights and shadows rather than letting them dictate the final look.
3. Use Fill Light to Keep Shadows Rich, Not Muddy
Darker skin tones naturally absorb more light, which can lead to shadows that are too deep and lose important detail. While contrast can be beautiful, shadows that are too dark can flatten the image and obscure facial features. The solution? Use fill light to lift the shadows while keeping the overall contrast intact.
V-Flats for Natural, Controlled Fill
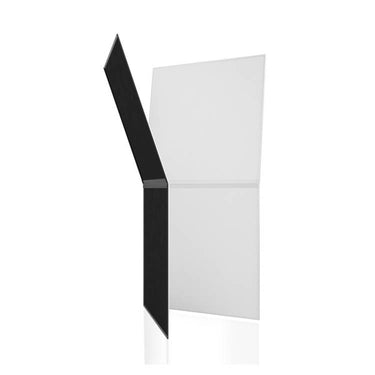
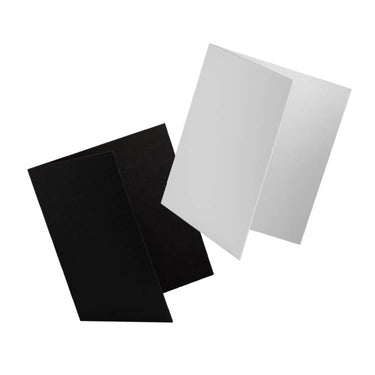
Lindsay is a big fan of using V-Flats to control shadow density. In her setup, she positions the main light to one side, which creates shadows on the opposite side of the model’s face. Without fill, those shadows can be too dark. By placing a white V-Flat on the shadow side, she bounces light back onto the model’s face, keeping the shadows natural and flattering without flattening the image.
This technique mimics how natural light reflects off walls and surfaces outdoors, making the light feel soft and realistic.

Lindsay also experiments with moving the V-Flat in front of the model instead of to the side. This changes the effect from a subtle rim light to a more direct fill, which brightens the whole face and brings out even more detail. Small adjustments in V-Flat placement can completely change the look of your beauty portrait, so playing around with positioning is key.

Other Fill Light Options
If you don’t have V-Flats, white or silver reflectors can do the trick. Silver reflectors bounce more light for a stronger effect, while white reflectors create a softer, more natural look. Lindsay also recommends a Triflector, a tool with three adjustable panels that allow you to shape light to enhance different facial features.

With a Triflector setup, light bounces under the chin, brightens the eyes, and softens shadows on the darker side of the face. Because darker skin tones are naturally reflective, small adjustments to the reflector’s angle can make a big difference in how light appears on the skin.
Make Fill Light a Conscious Choice
Fill light shouldn’t be an afterthought. Whether you’re using a V-Flat, a reflector, or an additional light source, it should be a deliberate part of your lighting setup. High-key images may need more fill for a bright, airy look, while dramatic portraits benefit from just enough fill to shape the shadows without eliminating them.
Small Tweaks, Big Impact
Lindsay’s approach to photographing darker skin tones is all about understanding light and making intentional choices. By dialing in white balance, choosing the right quality of light, and using fill to control shadows, you can ensure that your subject’s skin looks rich, vibrant, and beautifully lit.
These techniques provide a solid foundation, but the best way to master them is to experiment. Every subject is different, and the best results come from adapting these principles to fit the specific person and creative vision. The more you practice, the better you’ll get at adapting these principles to create stunning portraits that highlight the beauty of every skin tone.






Leave a comment
This site is protected by hCaptcha and the hCaptcha Privacy Policy and Terms of Service apply.