


How to Create Soft Light in Photography | Emily Teague
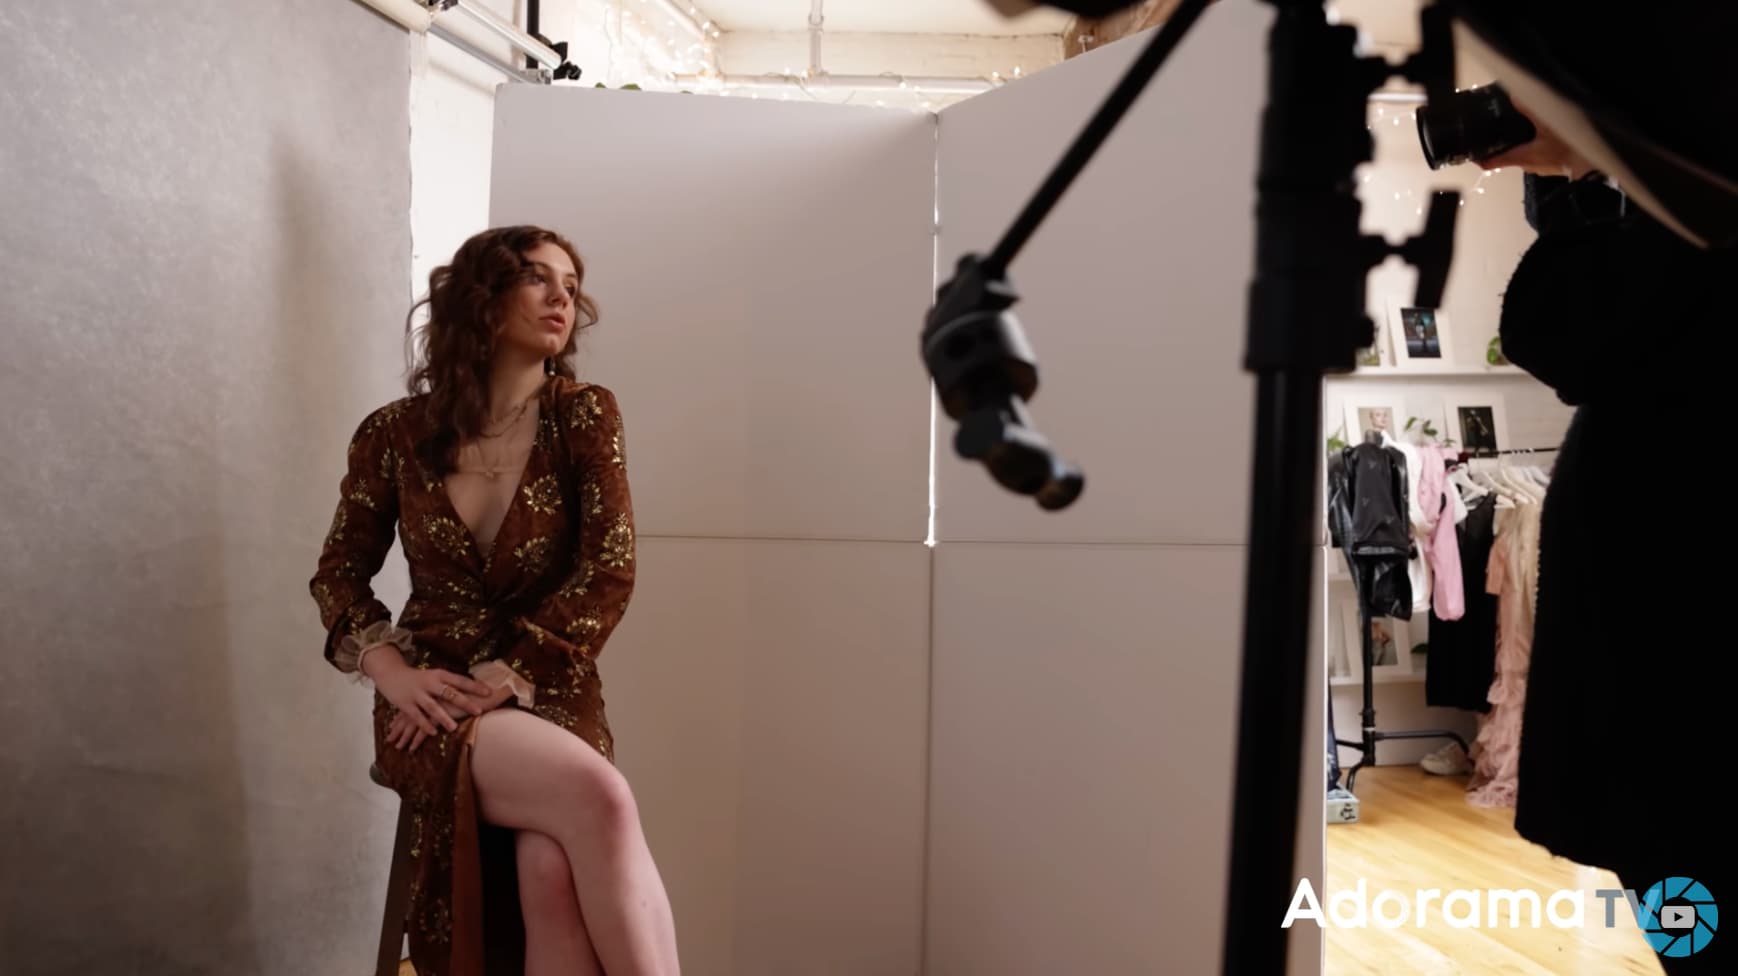
In the latest video by Adormama, Brooklyn-based portrait and fashion photographer Emily Teague teaches us about studio lighting, particularly how to create soft light, which is the opposite of hard light (naturally…). Join us as Emily explains the difference between soft and hard light and how to achieve soft light with different light modifiers.
What Is Soft Light?
Soft light “tends to wrap around your subject, casting diffuse shadows with soft edges. The transition from light to dark is gradual,” explains Emily. “Whereas with hard light, you’re getting those abrupt and defined lines between the light and dark.”
More even and broad, soft light diminishes texture and smooths out uneven surfaces. Practically speaking, Emily explains that if your subject has “a lot of texture on their face like acne or bumps, soft light can help make that appear less noticeable.” Basically, soft light equals flattering light for anyone sitting in front of your camera.
How to Create Soft Light by Diffusing the Light
To diffuse means to “spread” or “scatter.” When it comes to lighting, diffusion refers to anything that spreads, scatters, or breaks up the concentrated beam of light coming from the light source. And it doesn’t have to be a fancy light modifier specifically made for photography. Diffusion could be a white bed sheet hung in front of a bright window or a lampshade to soften the light of a bare bulb. Diffusers filter the light and reduce the intensity of both light and shadow.
Using her Elinchrom Rotalux as an example, Emily shows us the internal diffuser as well as the external diffuser.

With the Rotalux, you can shoot with one layer of diffusion for soft light or add another layer to increase the diffusion. Each layer adds softer, more even lighting, but the flipside of this is that your light loses power with each layer it has to travel through.
In order to create really soft light with her softboxes, Emily uses three layers of diffusion (called a baffle in the video): an inner diffuser, an outer diffuser, and yet another diffuser over the outer diffuser. Dazed and diffused yet? Hopefully not. Let’s move on.
How to Create Soft Light by Making Your Light Source Bigger

Here’s a good rule to remember when lighting your subjects: The larger your light source in relation to your subject the softer the light will be. “If you have a 100cm softbox,” Emily says, “and you also have a 175cm softbox and you trade them out to be at the same place on set, that 175cm softbox is going to give you much softer light. Just keep in mind the size is in relation to your subject.”
For example, a flashlight is a small, hard light source in relation to a human, but a flashlight to a needle would be a large, soft light source. Again, this is because size matters in relation to the subject.
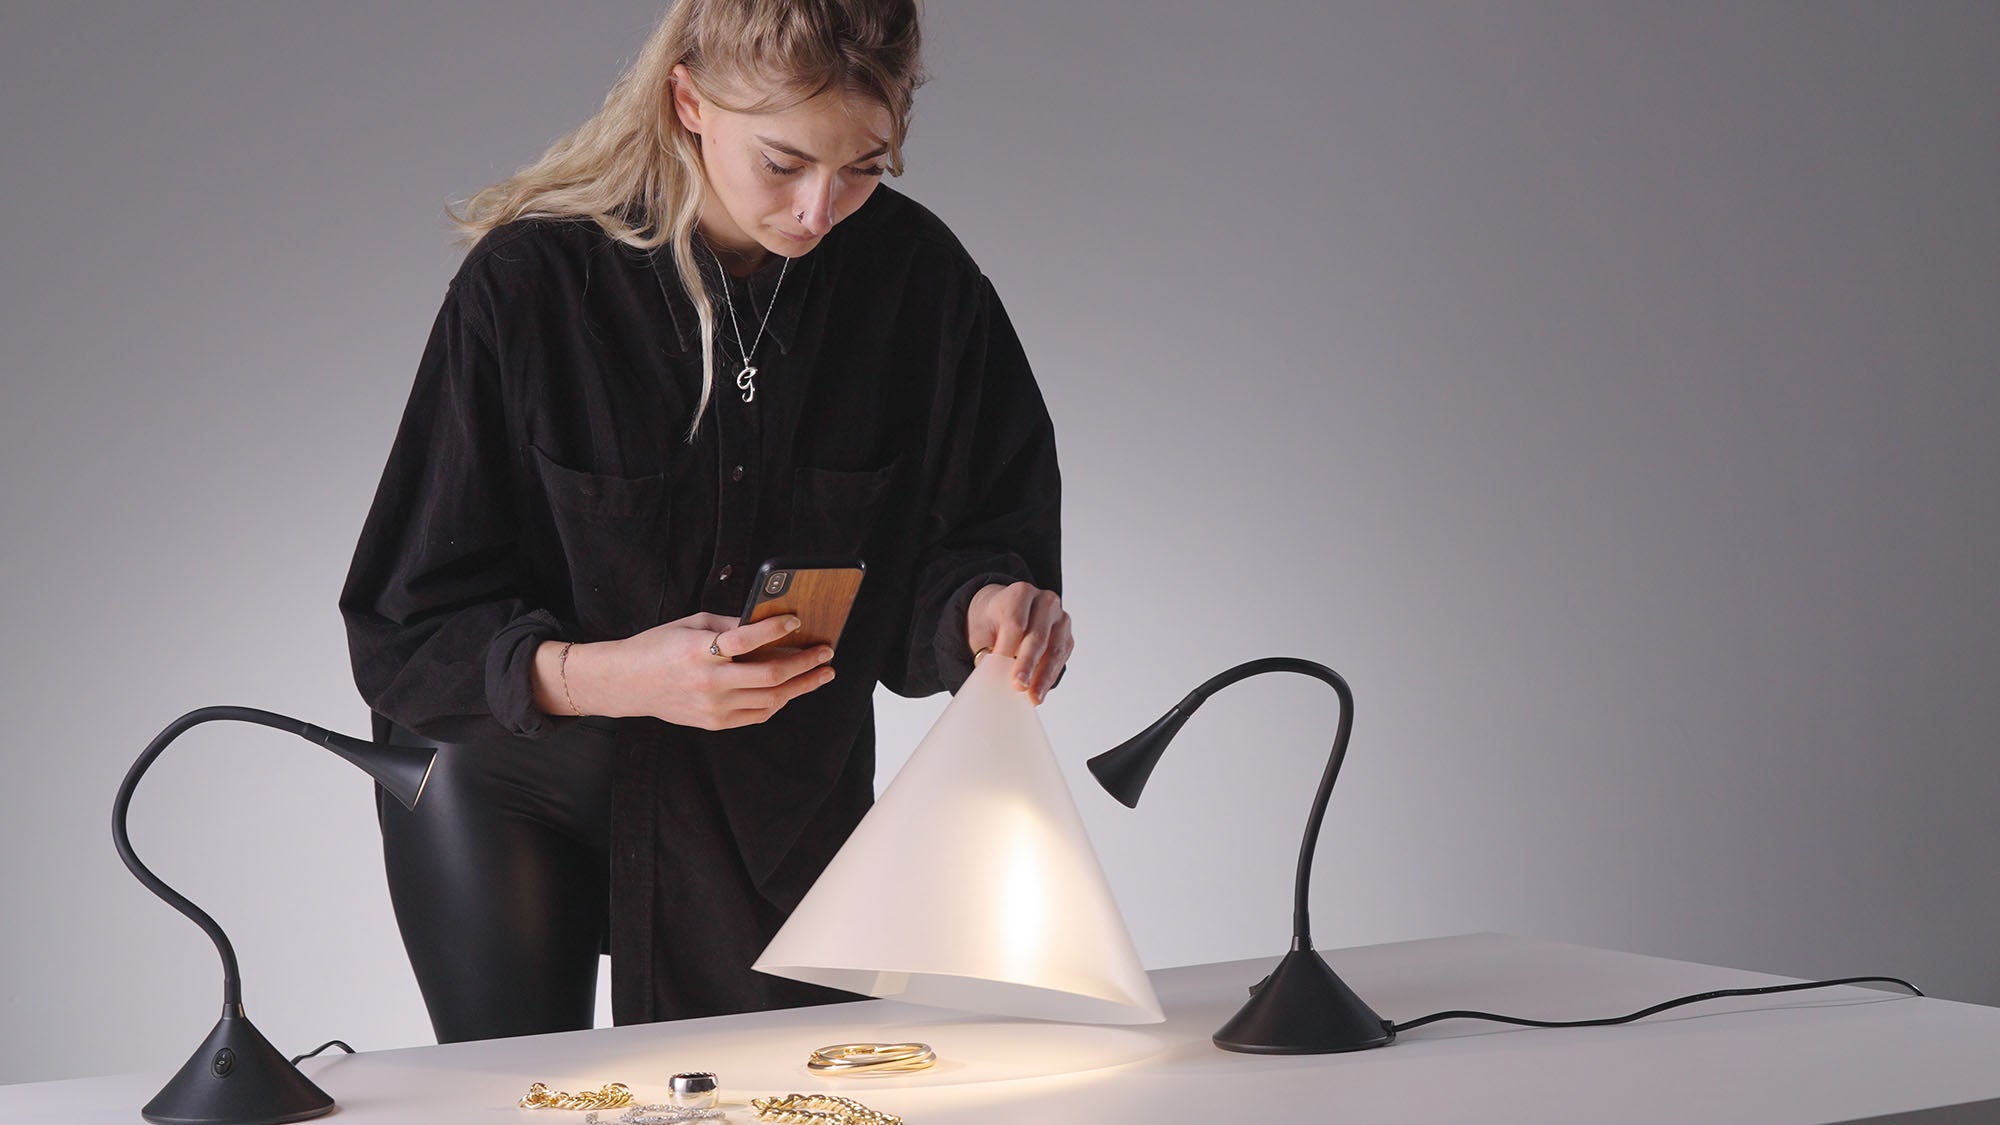
How to Create Soft Light by Bouncing the Light with a V-Flat
“When light hits a white or light-colored surface, it bounces back,” Emily explains. You can bounce light off any number of light-colored surfaces such as a white ceiling, wall, bedsheet, softbox or V-Flat. Placing a white or light-colored surface opposite your light source effectively bounces the light back to the model, filling in the shadows and creating softer light for beautiful portrait lighting.

V-Flats are also great for chin fill if you have an overhead light above your model casting dark shadows underneath the jaw. As Emily says, “A white surface underneath your model can bounce some of that light back up onto your model and lift those shadows up a bit.”
Another way to bounce light is to aim your light at a V-Flat or another white surface rather than shooting the light directly at the model.
Just like diffusion, the intensity and power of the light decreases when bounced. If you’re bouncing off a large surface like a white wall or a V-Flat, the light becomes a bigger light source, which echoes back to what we learned about the relationship between the size of your light relative to the subject. This results in a broader, more even spill of light on your subject.
How to Create Soft Light by Bouncing Light Inside Your Softbox
Light also bounces inside your softbox. Turning to her Elinchrom Rotalux softboxes once again, Emily points out the textured, reflective, silver fabric on the inside of the softbox. “This silver lining is going to reflect and bounce our light while also increasing the output,” she says.
If your goal is to shoot with really soft light, Emily recommends shooting with an inverse-mounted softbox instead of direct. This means the strobe will face into the softbox rather than outward so that it shoots into the box where it then has to bounce around inside the silver lining before reflecting out the front diffusion panel.


“If I wanted to get real crazy with my desire for soft light," Emily continues, "I could do the same thing with the inverse mount, but have it directed towards a white V-Flat where it would bounce again and then come back on my model.”
She then takes it a step further by saying, “I could even have the V-Flat it’s bouncing off angled so it hits another V-Flat and then that light comes back on my model. That would result in some super soft light.”
Whoa…🤯
Tell us, how much bounce does a light need to bounce for a dreamy bounce, soft light bounce? We suppose it’s a matter of personal preference. The answer is up to you.
Key Factors to Keep in Mind When Bouncing and Diffusing Light
With all this diffusing and bouncing of light, there are two key things to keep in mind while shooting. For starters, be sure you have enough light output to get the proper exposure. Remember that you lose a lot of light when diffusing and bouncing.
The other thing is that while soft light is broad and even, the downside is that it’s not as contrasty as hard light, so the look can come off a little flat. Emily loves working with soft light and it’s her personal style of shooting, however, she says, “I also love my shadows and having it on the more dramatic side so I probably wouldn’t go as far as the diffused and flat look unless that’s what I was trying to achieve.”
One way to create soft light without sacrificing contrast and drama is to think about the size and angle of your light. For instance, pointing your light down and raising it up above your model will partially light your model and leave shadow areas under the model’s jaw or collarbone. This results in “soft and flattering shadows that also add depth to the look.”

And finally, don’t miss this important point from Emily: “Make sure your lighting style works with the feeling of the shoot.” In other words, stay cohesive. Don’t send mixed and confusing messages with the style of your lighting and the feel of the shoot (unless that’s part of the assignment). Make sure the lighting contributes to the story you’re seeking to convey through your imagery.
Emily, thanks for teaching us some unique portrait setups to create soft light. To our readers, thanks so much for reading and watching. Drop a comment if you learned something new or found the information useful.
Gear
Camera: Canon 5D Mark IV
Lens: Canon EF 24-70mm f/2.8L II USM Lens
Lighting & Modifiers: Elinchrom Rotalux 39” Deep Rotalux, Elinchrom 59" Deep Inverse Octa Hybrid SoftBox, Elinchrom ELC 500 & ELC 125, Foldable V-Flat
Get Connected
Photographer: Emily Teague, www.emily-teague.com
Model: Lisa Stapleton @lisa.stapleton
Wanna Learn More?
We’ve got over 100 videos on our Behind the Scenes page with tips and tricks for photographers and videographers of all genres. Learn how to light, shoot, and more.
Leave a comment
This site is protected by hCaptcha and the hCaptcha Privacy Policy and Terms of Service apply.