1 Gray Background, 5 Different Looks & Colors
Our favorite photography educator, John Gress, tackles one of the most practical questions in portrait photography: if you could only own one background, what color should it be? His answer might surprise you – it's gray. But not for the reasons you might think.
In this video, John demonstrates the incredible versatility of a single gray backdrop by creating five completely different looks with model Christian. From basic catalog shots to dramatic film noir portraits, he proves that it's not about the background itself, but how you light it.
Look 1: The Foundation Shot
John kicks off with what he calls the "mystery background" – a simple gray backdrop that every model needs in their portfolio. This is bread-and-butter territory, the kind of clean catalog shot that pays the bills.

Setup:
- Ellen Chrome ELC 500 with 150cm octabox (model's left)
- Camera settings: 1/1200s, f/5.6, ISO 100
"Every model is going to need a picture like this," John explains, noting how the same setup could easily transform into a fashion image with more dramatic lighting, clothing, or posing. It's the photography equivalent of a little black dress – works every time.
Look 2: Blue Night Magic
Next, John completely transforms his gray background into a rich blue nighttime scene, proving you can change the backdrop to any color you want using gels. It's like having an entire backdrop collection hiding in plain sight.

Main Light Setup:
- Mola Rayo 15" hard reflector with blue gel
- Light meter reading: f/4 on model's face
Background Magic:
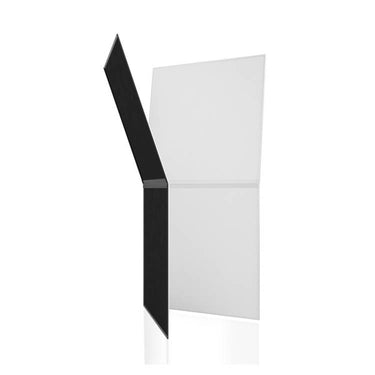
- Two 7" reflectors with blue gels bouncing off V-Flats
- Light meter reading: f/4 on backdrop
- Creates perfectly even background lighting
The Sizzle Factor:
- Nice Photo SN29 optical snoot with slit gobo and yellow gel
- Set to half power (5.3 on Elinchrome, 250 watt seconds)
- Light meter reading: f/5.6 on eyes
- Combined exposure with main light: f/8
- Camera settings: 1/1200s, f/8, ISO 100
John's color theory game is strong here – blue creates that nighttime mood while the complementary yellow provides serious visual punch. He admits the setup gets a bit cramped, requiring some manual light wrangling mid-shoot to nail that perfect eye streak. John discovered through previous experimentation that bouncing light off V-Flats gives the most even background coverage – sometimes the best techniques come from trial and error.
Look 3: The Gradient Game
John shows how that same gray backdrop can create a smooth gradient for classic film noir vibes. This is where understanding light falloff becomes your secret weapon.
Main Light:
- Mola Rayo pointed away from background
- Light meter reading: f/8 (slightly overexposed for better B&W contrast)
Edge Light:
- 7" reflector (no grid) behind model
- Light meter reading: f/4 on back of neck
Gradient Creator:
- 7" reflector placed 18" from backdrop
- Start at minimum power, test shots to dial in the look
- Light meter reading: f/11 on backdrop (1⅔ stops over exposure)
- Camera settings: 1/1200s, f/5.6, ISO 100
John's pro tip: Position the background light 1-3 stops brighter than your shooting exposure. Sometimes he'll add a grid for more dramatic falloff, but getting close to the backdrop usually does the trick.

Look 4: Pure Black Drama
Without changing the backdrop, John simply flicks off the gradient light and boom – pure black background. Same backdrop, completely different universe.
The Setup:
- Same lighting as Look 3, minus the background light
- Only edge light and main light remain
- Background goes black from underexposure
"That's what happens with a gray background when you underexpose it," John explains. "It just gets darker and darker and darker."
The beauty is you don't always need to point lights away from the background. Sometimes natural light falloff over distance does the heavy lifting – if your subject is about three stops brighter than what's hitting the backdrop, you're in black territory.
Look 5: Clean White Transformation
For his final trick, John pulls the ultimate backdrop switcheroo – turning gray into crisp white.

The Flip:
- Reposition kicker light, remove hair light
- Move background light to camera left, increase height and power
- Light meter reading: f/16 on backdrop center (2 stops over exposure)
Main Light:
- Deep silver umbrella on camera left
- Creates large, punchy light source
- Light meter reading: f/8 on face
- Camera settings: 1/1200s, f/8, ISO 100
John admits he could have pushed the background to three stops over for pure white perfection, calling it out as one of his rare missteps. Hey, even the pros keep it real.
The Bonus Pro Tip
John wraps up with some technical gold about continuous lighting. Adding continuous light for catchlights doesn't affect overall exposure when mixing with flash, but does cause the model's pupils to contract, making eye color more vibrant and pronounced – evident in Christian's striking blue eyes throughout the shoot.
Why Gray Might Just Be Your New Best Friend
Through these five setups, John proves that the best creativity often comes from the tightest constraints. A single gray backdrop becomes a shapeshifter when you understand light control and color theory. Whether you're building your first studio or working with a shoestring budget, this demonstration shows that it's not about collecting every background color under the sun – it's about knowing how to create them with nothing but light and a little imagination.
Sometimes the most boring choice turns out to be the smartest one. Gray might not be glamorous, but it's the ultimate team player in your studio arsenal.
Wanna Learn More?
We’ve got over 100 videos on our Behind the Scenes page with tips and tricks for photographers and videographers of all genres. Learn how to light, shoot, and more.




Leave a comment
This site is protected by hCaptcha and the hCaptcha Privacy Policy and Terms of Service apply.